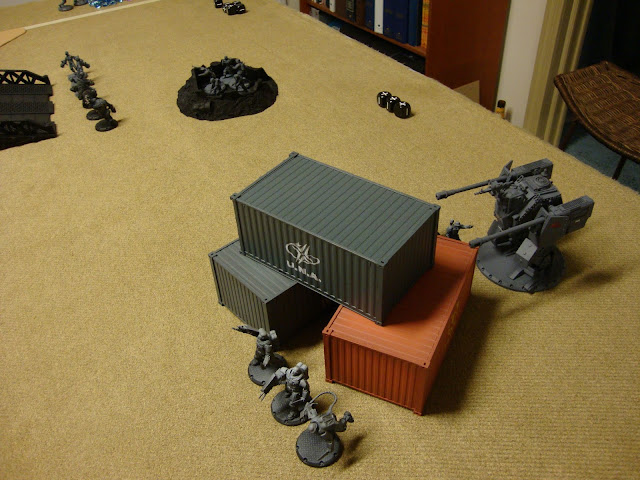
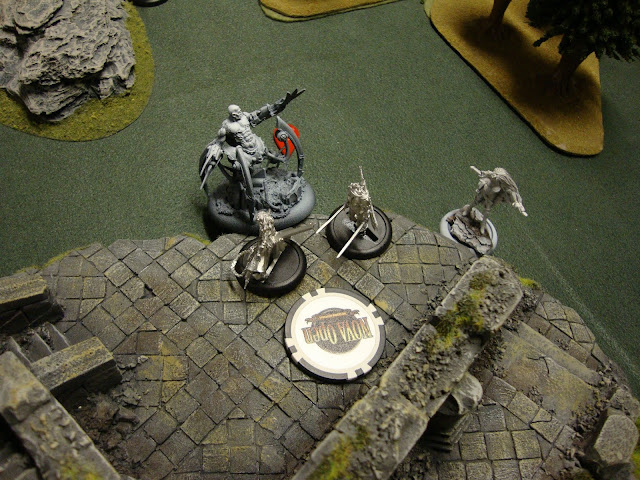
Happy, happy, joy, joy! Two wonderful surprises arrived in the mail today.
First off, my copy of CoolMiniOrNot Annual 2011 arrived. Yup, that's the correct year. As a matter of fact, I had to double-check the copies I already owned to make sure I wasn't ordering a duplicate. On top of that, I couldn't remember if I had made it into the book or not. Turns out I did! Twice!
CMON tweaked the format for the book this year. The photos are larger, I think. Which is both good and bad. It puts my minis under a microscope. Shudder.
Here are my Pirate Goblins by Freebooter's Fate (the three photos in the column on the left). I'm surprised they left out the Goblin Mariner, which I thought was one of the stronger pieces, but, hey, I'm not complaining!
And here is Defiance! (lower right) -- the piece that won Best in Show at the NOVA Open and won me airfare to the upcoming Adepticon 2013, paid for by CMON themselves, so that I can compete in the Crystal Brush.
Very thrilling!
I won't be featured in 2012, unfortunately. My one submission, my Freebooter's Fate Brotherhood of Assassins crew, missed the threshold by 0.1! Oh well, I hope my new diorama that I plan to paint for Adepticon will make the grade for 2013.
And on top of all of that, the postman also brought my new photo backgrounds, by Hangar 18 Minis. Now I can prepare pics for CMON like the professionals do.
Wednesday, January 30, 2013
Game of Dust Warfare
I finally played a game of Dust Warfare. This is only my second game. It's been so long since the first game, I was practically relearning it. However, there's a huge difference between learning this game and learning Warhammer 40K. About 100 pages of rules different! Dust Warfare is so much simpler. And I like the core mechanics so much better for this type of tabletop combat. The reaction system and the suppression system make so much more sense. And the combat resolution is much faster, which means your focus can be more on the larger scale of the battle.
Here, I make my usual boneheaded mistakes on deployment. Let's see what happens if I charge my close combat troops across the bridge into the direct fire of the enemy!
I'm using my FUDGE dice as Dust Warfare dice. FUDGE dice are awesome. I never get to use them, so this works out really well.
The first game is a slaughter, so we run it again, this time with more terrain (the trees), which is recommended for the game, and now we see why. I also change my strategy, and I send my shooters ahead of my close combat zombies and gorillas, so that I can lay down suppression fire.
Storm the bridge, men! Uh, you, too, mindless zombies.....
The new strategy works. I manage to suppress the opposing forces enough to move my zombies into close combat, and....well, they're power-fisted, evil zombies -- I'm sure you know how it ends...
Friday, January 25, 2013
Dystopian Legions unboxing
New shiny! This is what I hoped to spend my Christmas money on, but it was unavailable at the game store. I ended up purchasing it online from FRP Games, my go-to hobby store.
You get really good value for money. All of this for $60 or $70. Excellent components and a rulebook, cards, and tokens of high print-production quality. You have everything you need to play a game, minus an opponent with a starter box of their own. The metal minis alone are probably what you'd pay for the same price.
After constructing fiddly Malifaux minis, these beefy single-cast figures are a welcome relief! Now these figures are made for gaming.
That said, they do have a few flaws with their casting.
The sword tip. That looks like simple flash from this angle, but it's actually a little deformed. Filing it will result in a "cut" in the blade, unless I fill it with green stuff.
A warped gun. I'm skeptical whether this will straighten out.
Some serious mould lines that will require some time to file down.
All that said, the figures will be easier to deal with than most of the minis I've been working on for other games. And they have great poses and character. Very exciting. And every model is different! Very nice.
I could compliment the figures for their detail, but they have the benefit of scope-creep. ;-)
Here is a figure next to a Warhammer human (Bretonnian).
These are not the same scale!
We're looking at 27mm to the eye, versus 35mm to the eye.
No biggie. It's not like you can proxy these minis for another game anyway. I think it will be nice to have a slightly larger scale, for ease-of-painting and ease-of-play.
Step-by-step
This is how I did the fabric texture on Ramos' bag.
A few test sprays through a mesh piece, cut from a grease-splatter cover. I learn that you have to keep the mesh close to the surface, and you have to maintain the same distance and duration over the area, in order to make the spots consistent.
Masking...
Results.
Geddy is mildly interested. Nah, not really. "Why aren't you playing with me?", he says.
More experimentation on Ramos
Here's my initial cut at adding some texture to Ramos' briefcase. The pattern turned out a little courser than I intended. I wanted to give the impression of a course-weave fabric. The effect here is interesting, but it doesn't necessarily convey anything specific.
I'll tone down the color with a glaze. And I might attempt adding a glowing emblem showing a pair of gears. That might be too busy, though, depending on how it looks when I tone down the fabric effect.
I don't know, should I just ditch the pattern and go for a simple emblem? A symbol, rather than a texture? I'm leaning towards a symbol. I like the texture, but I might save the idea for a different occasion.
Another game of Malifaux
We played a 4-player free-for-all on Thursday night. To keep it simple, we played the Shared Strategy, "Claim Jump", which is basically 'King of the Hill'.
My Ramos faction is in the lower-left, opposite Wyatt's Viktorias. The other corners are a mirror-match between two Lady Justice factions, Tim on the lower-right and Wyatt's wife, Katherine, on the upper-left. The disc in the center is our common objective marker. Let's get it on!
Middle of Turn 2, and everyone is jockeying for position and making initial thrusts and parries. The Steamborg lets off some steam to protect Ramos while he scavenges for spare parts to build more Steampunk Arachnids. The Death Marshals have never encountered such a monstrosity, and they are rightly unsure how (or if) to approach it. On the opposite side of the board, a Death Marshal has pine-boxed Taelor, I think it was, only to be gunned down by the Viktoria crew, rescuing the coffin-victim. Other members of the faction shoot and swing at each other through holes in the wall.
Katherine's Lady J crew has their eye on the objective and bring the unit in-force.
Everyone's forces are pulled and tugged and scattered, as everyone continues to jockey for position and either look for flanking opportunities or, from the opposite side of the coin, catch the loners. The Death Marshal attempts to escape the clutches of the Steamborg, but the Steamborg manages to twice catch the hem of the Marshal's overcoat on the points of his lobster scissor-hands (both duels were tied, barely giving the win to the Steamborg). Soon after this photo was taken, Ramos fries the Death Marshal, only to have the Death Marshal die in a blaze of glory, unloading his gun into the Steamborg and filling it full of lead, bringing it down to half-strength.
The evening comes to a close, and so everyone rushes the objective. The two Lady J's provide entertainment for all players, as the justice-serving ladies engage in a catfight bitch-out. Katherine's Lady J emerges victorious.
Everyone makes it to the objective, except for Ramos' faction. That is, until the Steamborg performs the last activation in the round. He skittles with terrifying speed to the objective and proceeds to decapitate a Viktoria, robbing Wyatt's place in a 3-way tie, all to the tune of "Something for Nothing" by Rush. Huzzah!
Curb-stomp, beeatch!
Tuesday, January 22, 2013
More Arachnids
Having played my first Malifaux game with Ramos, I felt shorthanded not having an extra Steampunk Arachnid in the crew. If I lose just one of my three starter Arachnids, I can't form a Steampunk Arachnid Swarm. Having the Swarm is key, because not only is it more powerful, but it can self-heal and repair all of the constituent Arachnids. Having the individual Arachnids is important, too, so that you gain more activations over your opponent and force him or her to reveal their strategy.
So....here are more Arachnids entering the steampunk assembly line. The newer models are better casts, because they come in one piece instead of three fiddly pieces that require you to glue on tiny, fragile legs. Here are the models with their legs filed down to remove the flash and to give an impression of sharp blades.
Soon to follow will be an Electrical Creation, a Mobile Toolkit, a Soulstone Miner, a Large Steampunk Arachnid, Union Miners, and Willie the Demolitionist.
I just received word today that my date to play Alkemy just fell through. That sucks on one hand, but it's probably a blessing-in-disguise, so that I can concentrate on what I should really be focusing on. Which is probably Carnevale and Dust Warfare and definitely my diorama for Crystal Brush. I'm going to follow my current motivation for a just a little while longer, though, and finish assembling the Eden starter pack and expanding my Ramos Malifaux crew. I figure I have a little bit of time to pursue these current larks.
Monday, January 21, 2013
The Fantasy Palette
'Thuvia, Maid of Mars', Frank Frazetta, 1974 |
I'm using this classic fantasy illustration by the great Frank Frazetta to introduce a slide presentation that I'll be presenting to the National Capital Model Soldier Society (NCMSS). The topic is the use of color in fantasy illustration and now miniature painting. I explore the history and evolution of using rich, kaleidoscopic colors in this genre, and I show the experiment from one of my earlier blog posts, where I attempted this approach to color on a Troll (with marginal success).
I have about a dozen slides so far, most of which show the progression of fantasy illustration from Frazetta and Boris, through proteges like Suydam and Bisley, and on to modern guys like Bonner. I'm now in the process of collecting photos of miniatures that show this same approach. I'll finish the presentation with my Troll experiment, and I'll have the actual miniature at the meeting for folks to look at.
Another project I'm working on is organizing Demo Day for the end of February. Most of that work is done, but I still need to produce a flyer and post announcements on the various gaming forums. Much of the miniatures painting I'm doing right now is driven by the goal to have factions ready-to-play by the time Demo Day rolls around. There's the possibility to play Alkemy or Eden for the first time, since one of the game-hosts plays those games. I'm also preparing two or three Carnevale miniatures, with the hope that I might demo that game. That goal might be ambitious, though, so my fallback plan is to demo Fantacide. I haven't played the game yet, but the thought is that it's achievable for Demo Day, since you can use any miniatures in your collection. The down side is that I'll need to define the stats for the factions and produce reference sheets, so there is still plenty of work involved. We'll see where things stand at the beginning of February, when most of these other projects are either finished or fully prepped.
The beginning of February is a milestone also because I'll be putting the new NOVA Open judging system to the test. Another big project over the last couple of months has been overhauling the scoring and judging criteria and logistics for both the Appearance Judging and the Art Competition for NOVA Open 2013. I developed rules and material for both of these events, and wrote up formal primers, which should be released by February 1st. We still need to do some final tweaks. Mike Brandt (NOVA Open CEO), Bob Likins (regular NOVA Open painting judge), and I going to test the Appearance Judging standards on February 2nd, at a 40K event at Huzzah Hobbies in Ashburn, Virginia.
Two of these projects will tie together, when I convert my slide presentation into a training tool for NOVA Open judges. I'll be composing a training presentation to cover art concepts such as: composition, color harmony, thematic unity, value/contrast, and other similar topics. Plus, I'll cover techniques more specific to models and miniatures, like weathering, basing, etc.
I plan to complete most of these projects by Demo Day. After Demo Day, I have only 6 weeks to build and paint my diorama entry for Adepticon!
Game Night and Thoughts on Malifaux
My gaming group decided to move Thursday Game Night to every other Friday. This past Friday was our launch, as was my reattempt to play Malifaux, after a 2- or 3-year hiatus.
I already expressed my complaints with Wyrd miniatures, i.e. fiddly and fragile multi-part models, but I have to say, their appearance on the tabletop is inspiring. They have a presence and dynamism, even when the poses are relatively static, that brings you into the cinema and flavor of the game.
Here is my Steamborg letting off some steam in the heat of battle (ha, ha), to conceal his fellow fighters.
Ramos (lower-right) is about 80% painted, and the rest of the crew is obviously only primed. However, priming with the airbrush in both black and gray is a nice way to at least get started. Playing with black-and-white versions of the models at least provides contrast and 3-dimensionality to identify the models and reflect their action and character on the tabletop.
As for gameplay, my complaint about Malifaux and Warmachine/Hordes is that the amount of special rules for each model (probably averaging around 10 per model) presents an overwhelming, up-front learning curve. It's hard to learn how to operate each model, much less learn all the combinations and synergies between the models in your faction/crew. And that's just one faction. Now try learning your opponents' factions, and if you're a league or tournament player, learning all of the factions. Compared to Freebooter's Fate, where you might have only a couple of special abilities per model, Malifaux is a brain-burner to learn.
Another setback for me when I first started Malifaux was the fact that I bought 3 factions, with the expectation that one of them would be a competitive faction. I learned from 40K that you can't count on the factions to be balanced, so I figured I would preempt that frustration. Unfortunately, I selected my factions according to my usual criteria, what models I liked, instead of researching which factions were reported to be stronger or weaker. Turns out, all three of my factions were regarded as relatively underpowered (Bayou Gremlins, Marcus, and Zoraida). Between the difficulty of learning the factions and the frustration of being pummeled by opponents who devoted more time to researching the combos for their well-powered factions, I allowed Malifaux to fade to the background.
Eventually, I was to try again, and that is what led me to buy the Ramos starter set, which I read was respectable in its relative ability and relatively simpler in its depth of special abilities. Even that opportunity fell to the wayside, but that is why I had the models on-hand, when several members in my current game-group expressed interest in giving Malifaux a try. Attempting it again with fellow newbies was appealing enough to give it another go.
All to say, I enjoyed our game on Friday night! I lost, of course, but the game was close, and the balance and tension of the opposing forces held my interest and gave me the mental challenge that I enjoy. Each side had enough muscle to dish out the pain, and each side had interesting tricks and tactics to throw curve-balls into situation. I have more to learn about combining and sequencing the special abilities in my faction, but it feels like a manageable learning curve that will be fun to learn, rather than a daunting obstacle.
Tuesday, January 15, 2013
Malifaux - Ramos
I hosted a paint evening with 3 buds -- hanging around a table, painting models, shooting the breeze, and listening to music. A nice evening. This is how far I got on Ramos in a couple of hours. I'm torn on whether to add color to his pants or not. I definitely want to do something with his bag, if nothing more than color it brown, but I'm tempted to add a pattern, even try a subdued carpet-bag look. I hesitate, though, because I don't want other elements of the model to compete with the central focus of the face and the flame. Tough choices.
Sunday, January 13, 2013
Dipping my toe into airbrushing
A rainy, Sunday afternoon -- a good time to fiddle about with airbrushing and figure out how I'm going to set up, organize, and learn this new skill. I struggled for a few weeks deciding where to set this up. Ideally, I wanted a permanent station, but that's just not in the cards quite yet. I need to either give away or sell my unused keyboard to make room for a dedicated station, or I need to feel confident enough with controlling the airbrush that I can set it up in the office/studio with the rest of the hobby stuff. Neither of these options are viable soon enough, so I'm setting up a semi-permanent station in the basement, like so.....
I try out two different airbrushes on a relatively safe exercise -- priming. I want to learn how the different airbrushes behave -- their spray patterns, the effects of varying the air pressure, how they clean, etc. I want to learn what supporting equipment and supplies I need (or don't need!) to make the process efficient and enjoyable.
I learn that I actually have decent control of the overspray, even when using a sub-optimal airbrush. I learn that two of my airbrushes are sub-optimal! Obviously, there's newbie error involved, but it's all relative. More on that later.
Priming with an airbrush is amazingly convenient and cost-effective. Sure, there's a significant up-front investment in equipment, but when you can coat multiple models with just a few drops of primer, the equipment will pay for itself very quickly. Plus, I am no longer a slave to the weather. No more risk of trashing miniatures with spray-primer that turns gritty from the humidity. Plus, I have tremendous control over the placement and thickness of the primer on the model.
I try some zenithal highlighting with gray primer over the black base. These models are going to practically paint themselves!
Here's what I've learned about my airbrushes. I wish I had this kind of insight when I was shopping for airbrushes, so hopefully this is useful to someone out there in blog land (if so, you can thank me by being a Follower on the blog!).
The airbrushes below are shown, from top to bottom, Fail to Win.
First up, a single-action, siphon-feed Badger 200 NH, purchased at Michael's. I purchased this airbrush to learn on. Single action is simpler, and it's probably easier to clean and maintain. I planned to use this on coarse work, like terrain, just to learn the basics of airbrushing and learn how to clean and maintain it. It did serve this purpose, and, indeed, terrain is probably all this brush is good for. I did use it to apply the camo pattern on that Devilfish model, but it was a struggle. I didn't have the fine control I needed. I'll continue to use this for terrain, but the control is inadequate to even do simple priming. I'm sure I could improve the control by twiddling with the air pressure and the limiter, which I attempted to do with the Devilfish, but it's just not worth it when there are better tools, even for a beginner.
This situation is analogous to learning an instrument, say guitar. If you want to learn guitar, don't buy a cheap guitar to "test the waters" to see if it's something you'll stick with. Buy a quality instrument. A poor instrument is hard to learn (hard to fret the strings; hard to keep in tune; etc.), and you just set yourself up for frustration, and you give up. A quality instrument feels good to play -- even if you suck. A quality instrument draws you back to play again -- until you don't suck. Same with airbrushes, I think.
The second airbrush is a dual-action, gravity-feed Thayer & Chandler Omni 4000. This is the airbrush I requested for Christmas after doing a lot of on-line research. Unfortunately, I didn't realize that this brand is, for all practical purposes, out of production. Badger bought it, I think, but it was a real chore trying to find a hose or adapter, just to connect the thing. When I finally purchased parts to enable using the airbrush, I used it as my learning instrument. My learning exercise was to spray terrain, and I probably made two mistakes. One was blowing house latex paint through the airbrush. That's probably OK for the Badger 200 NH, but probably not for the Omni, which has a finer needle. Secondly, I cleaned it using a cleaning kit. I learned from a YouTube video that you shouldn't use the brush cleaning kits, because they'll damage the finely calibrated fit of the needle and other components. That YouTube video was an hour-and-a-half presentation series by the second-generation owner of Badger. Sorry, I don't remember his name -- I came across the video by way of Wargamers Consortium. Anyway, this airbrush has presented a bit of a headache, and it didn't seem to offer any better control than the Badger, possibly because it may have microscopic scratches in the needle housing, due to cleaning it with the cleaning kit.
That brings us to the dual-action, gravity-feed Harder & Steenbeck Ultra 8483. This was the control I was looking for! This is how I imagined airbrushing would feel. Now the downside with this airbrush was that I purchased it with a starter kit of Vallejo Air Color paint. Handy dandy. But I had no idea that the connector is a quick-release coupler. None of my screw-on connectors on my hoses worked, of course, and I had no idea what was supposed to work with it. It was only because the Grex salesperson showed me the quick-release connectors at the NOVA Open that I learned to recognize what this thing is. Luckily, I purchased quick-release adapters from the Grex guy, so I was able to try them out with this airbrush, and they worked. This brush was a pleasure to use and easier to clean than the other ones.
Next up will be my Grex trigger-action brushes. I wanted to get a clue to what I was doing before I risked using my hard-won NOVA Open prizes. I look forward to trying them out, and I have even higher expectations of their performance over the Ultra.
I try out two different airbrushes on a relatively safe exercise -- priming. I want to learn how the different airbrushes behave -- their spray patterns, the effects of varying the air pressure, how they clean, etc. I want to learn what supporting equipment and supplies I need (or don't need!) to make the process efficient and enjoyable.
I learn that I actually have decent control of the overspray, even when using a sub-optimal airbrush. I learn that two of my airbrushes are sub-optimal! Obviously, there's newbie error involved, but it's all relative. More on that later.
Priming with an airbrush is amazingly convenient and cost-effective. Sure, there's a significant up-front investment in equipment, but when you can coat multiple models with just a few drops of primer, the equipment will pay for itself very quickly. Plus, I am no longer a slave to the weather. No more risk of trashing miniatures with spray-primer that turns gritty from the humidity. Plus, I have tremendous control over the placement and thickness of the primer on the model.
I try some zenithal highlighting with gray primer over the black base. These models are going to practically paint themselves!
Here's what I've learned about my airbrushes. I wish I had this kind of insight when I was shopping for airbrushes, so hopefully this is useful to someone out there in blog land (if so, you can thank me by being a Follower on the blog!).
The airbrushes below are shown, from top to bottom, Fail to Win.
First up, a single-action, siphon-feed Badger 200 NH, purchased at Michael's. I purchased this airbrush to learn on. Single action is simpler, and it's probably easier to clean and maintain. I planned to use this on coarse work, like terrain, just to learn the basics of airbrushing and learn how to clean and maintain it. It did serve this purpose, and, indeed, terrain is probably all this brush is good for. I did use it to apply the camo pattern on that Devilfish model, but it was a struggle. I didn't have the fine control I needed. I'll continue to use this for terrain, but the control is inadequate to even do simple priming. I'm sure I could improve the control by twiddling with the air pressure and the limiter, which I attempted to do with the Devilfish, but it's just not worth it when there are better tools, even for a beginner.
This situation is analogous to learning an instrument, say guitar. If you want to learn guitar, don't buy a cheap guitar to "test the waters" to see if it's something you'll stick with. Buy a quality instrument. A poor instrument is hard to learn (hard to fret the strings; hard to keep in tune; etc.), and you just set yourself up for frustration, and you give up. A quality instrument feels good to play -- even if you suck. A quality instrument draws you back to play again -- until you don't suck. Same with airbrushes, I think.
The second airbrush is a dual-action, gravity-feed Thayer & Chandler Omni 4000. This is the airbrush I requested for Christmas after doing a lot of on-line research. Unfortunately, I didn't realize that this brand is, for all practical purposes, out of production. Badger bought it, I think, but it was a real chore trying to find a hose or adapter, just to connect the thing. When I finally purchased parts to enable using the airbrush, I used it as my learning instrument. My learning exercise was to spray terrain, and I probably made two mistakes. One was blowing house latex paint through the airbrush. That's probably OK for the Badger 200 NH, but probably not for the Omni, which has a finer needle. Secondly, I cleaned it using a cleaning kit. I learned from a YouTube video that you shouldn't use the brush cleaning kits, because they'll damage the finely calibrated fit of the needle and other components. That YouTube video was an hour-and-a-half presentation series by the second-generation owner of Badger. Sorry, I don't remember his name -- I came across the video by way of Wargamers Consortium. Anyway, this airbrush has presented a bit of a headache, and it didn't seem to offer any better control than the Badger, possibly because it may have microscopic scratches in the needle housing, due to cleaning it with the cleaning kit.
That brings us to the dual-action, gravity-feed Harder & Steenbeck Ultra 8483. This was the control I was looking for! This is how I imagined airbrushing would feel. Now the downside with this airbrush was that I purchased it with a starter kit of Vallejo Air Color paint. Handy dandy. But I had no idea that the connector is a quick-release coupler. None of my screw-on connectors on my hoses worked, of course, and I had no idea what was supposed to work with it. It was only because the Grex salesperson showed me the quick-release connectors at the NOVA Open that I learned to recognize what this thing is. Luckily, I purchased quick-release adapters from the Grex guy, so I was able to try them out with this airbrush, and they worked. This brush was a pleasure to use and easier to clean than the other ones.
Next up will be my Grex trigger-action brushes. I wanted to get a clue to what I was doing before I risked using my hard-won NOVA Open prizes. I look forward to trying them out, and I have even higher expectations of their performance over the Ultra.
Monday, January 7, 2013
Battle Report - Warhammer 40K
I almost forgot to post the game I played Saturday night! There's not much to post actually -- only 5 pictures. I might as well just show them all here, instead of linking to the Picasa album like I normally do.
My friend, Campbell, and I are continuing to evolve and test our lists. These games are more instructional than competitive. Campbell added new models to his Necron force, including the battle-barge thing and the scythe fighter aircraft thing.
4 out of 5 of the photos show deployment. Everything looks so wonderful at the start of the battle. Hopes are high. The armies look dashing. No wonder I take so many photos of deployment. Then everything goes to hell, of course.
Here's a view from the Necron side.
Closeups of the battlelines, in neat order. I'll paint that terrain one of these days!
My new Devilfish making its appearance. I haven't touched it since Christmas. It will be on hold until I get more figures assembled in preparation for Demo Day.
No doubt, all you Tau players immediately saw my horrible deployment error -- placing the Broadsides on the line. I should have had them in the backfield, where they would be entirely out of range of enemy weapons. Stupid mistake. Pretty much cost me the game. Here's the setup for my eventual annihilation. The Broadsides are nowhere to be seen..... Live and learn!
Sunday, January 6, 2013
Malifaux Modeling (continued)
I am currently extremely sour on Malifaux -- the Ramos faction just surpassed the Bayou Gremlins as my low point in assembling miniatures. Grrr.
Too many frikkin' tiny pieces...
Kit-bashing a base for the Steamborg Executioner.
I glued that punk's 4 legs an average of 2 or 3 times apiece, before getting it to work. The thing only balances when you finally manage to glue on the third leg, if you're lucky. Once establishing the desired poses with superglue, I attempted to reglue them with my old reliable, 2-part epoxy. Didn't work for this mini. The weight on the leg forces the join to separate, even after waiting a full 5 minutes for the epoxy to dry. I ended up using the trick of using a dab of paper towel in combination with super-glue. That requires follow-up work to remove the excess fibers. I resorted to burning some of them off with a lighter!
Here's the assembled crew.
I recommend novice modellers avoid this crew. It is an absolute bear. And it's so fragile, I'm paranoid to use it in the game. This is one of those occasional times when I really appreciate Games Workshop. They balance their designs among aesthetic, ease-of-production, ease-of-assembly, and durability for tabletop gaming.
Friday, January 4, 2013
Malifaux modeling
Yes, Hobby ADD strikes again. A buddy of mine expressed interest in trying out Malifaux. That motivated me to pull out the Ramos starter box that I shelved three years ago, when Malifaux fell to the backburner. I actually have the Gremlins and Marcus crews fully painted and ready to play (and half of Zoraida). But one reason I was disenchanted with Malifaux is the volume and complexity of the special rules for each model, along with all of the brain-burning combos and synergies. The Gremlins were not only one of the worst crews guilty of that down side, but they're relatively underpowered on top of that. Marcus and Zoraida aren't much better. That's why I picked up Ramos -- to attempt the game again with a simpler crew. But then the whole game faded to the background....
Filing mould lines off of these Ramos models reminded me of another reason that I'm disenchanted with Malifaux. The minis are so damn tiny and fiddly. You can see two legs are already broken for the tiny arachnids. Malifaux models are very poor models for gaming, because they're so delicate. Ridiculous, really. I know, gripe, gripe. Sorry, I"m fresh off this task. And I haven't even attempted gluing these little bastards together yet!
My buddy, Steve, and I plan to play a learning game next week. Steve is already frustrated, trying to understand the rules. He's reading the 1.5 big book. I have the mini-book, which I think is better presented, but still, I know what he's going through. I still have a few pages on the Wyrd forum from 3 years ago, trying to figure out how the Pigcharge works....
Anyway, I think we're going to have one or two chances for this game, before Steve decides whether to invest. Still, it's a motivator to put together the Ramos crew and see if the game feels smoother using a simpler faction.
Wednesday, January 2, 2013
More Alkemy Aurloks
These are such beautiful miniatures. So hard to work with, though! The resin is very hard, which is great for holding such fine detail, but it's a chore to scrape and sand the mould lines, especially on such tiny and fragile figures. Plus, the slender pieces require hot-water treatment to straighten them.
Anyway, I still need to fill gaps and magnetize the bases before I finally prime them. I love how these guys look, though. The poses have such life to them, and there's a good mix of dynamic and heroic poses. Can't wait to paint these guys and put them in action.
Subscribe to:
Posts (Atom)