This piece was my second entry for the Capital Palette 2016 painting competition at the NOVA Open gaming convention.
(I showed my first entry on this
prior post.)
My idea for the base was to have a fantastical landscape
of arches and columns, a la Roger Dean. The rider was to be careening
down a path that was integrated on top of one of the arches. The
overall environment was supposed to be arid, because the rider's garb
and mount have a flavor of the Middle East or the drier regions of the
Mediterranean. But I also envisioned the mandrills splashing in a
stream.
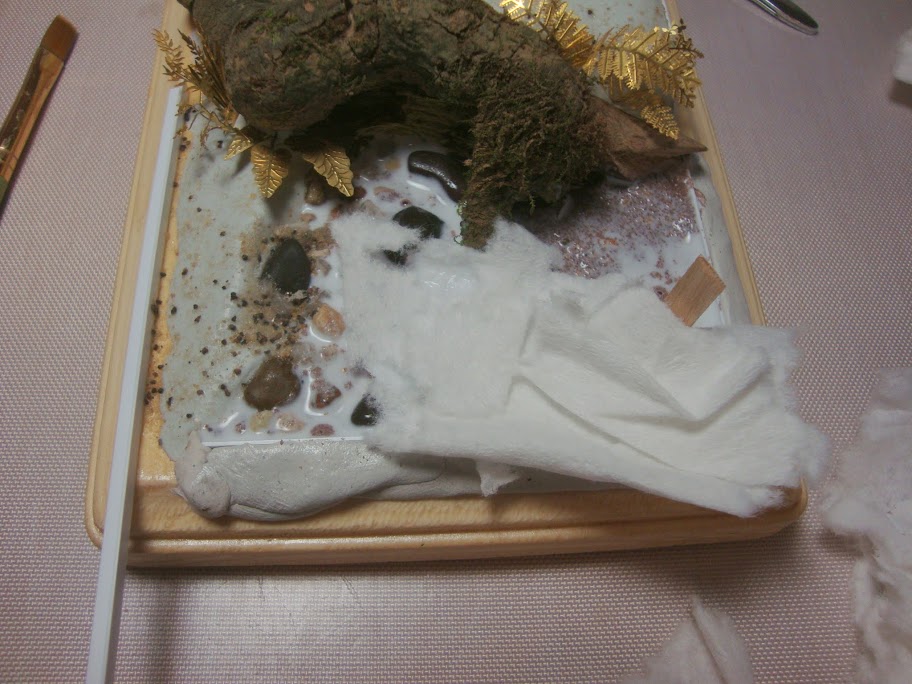
Over the course of several weeks, I made
occasional forays off the jogging trail to collect interesting pieces of
wood that might serve as the arches. I soaked the wood in a bleach
bath, in order to kill any critters buried in the wood, and then I
scrubbed the wood and then let it set in the summer sun to dry.
I
also purchased two gnarly wooden plinths from my friend, Caleb
Wissenback of CK Studios. I imagined that a natural bark on the edge of
the plinth would complement the landscape I had in mind.
 |
| Several
weeks were spent searching for just the right kind of interesting wood
branches, roots, plinths, and plaques to make an alien-like groundscape. |
I ruminated a half-morning trying to
figure out how to fit together a composition that would work. As it
turns out, there were 4 criteria that turned out to be conflicting
requirements:
- The position and relative height of the hunter needed to ensure that the hunter was the focus of the piece.
- The angle of the hunter needed to allow an easy view of the front of the model.
- The hunter needed a sightline to one of the mandrills.
- I wanted some 3-dimensionality to the piece.
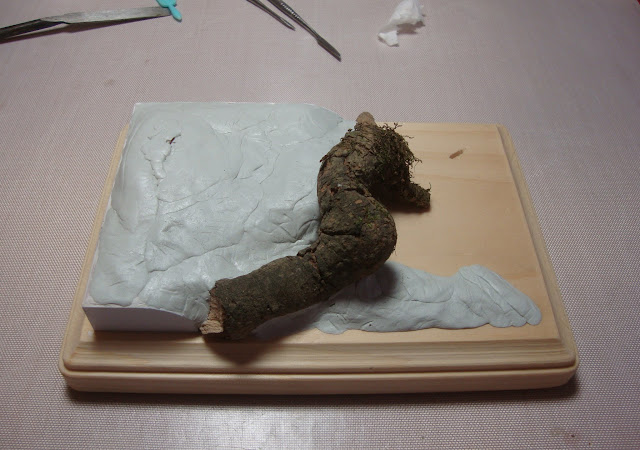
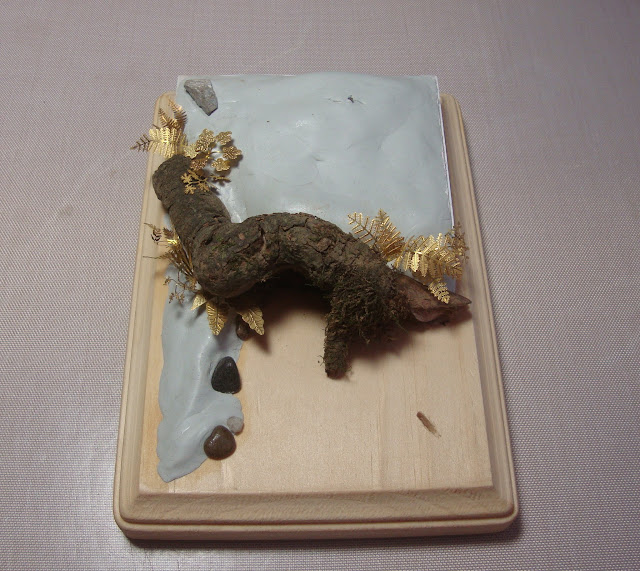
And at the end of the day, here is the foundation for the piece. One
simple piece of wood on a typical, store-bought plaque! All of that
time collecting a variety of interesting, twisted wood and purchasing fancy plinths turned out for
nought. I had to settle for a compromise.
 |
| I was forced to compromise to this relatively mundane affair. |
The sight-lines for the rider force the
models to be roughly level. Or, the hunter
could be higher up, angled down for the chase, which would be exciting
and closer to what I had in my mind's eye, but a lot of the detail for
the model would be visible only from a very low angle. Either that, or
the spacing between the hunter and the prey requires more distance,
which forces a larger base. A larger base can dilute the impact of the
miniatures, and a larger diorama just consumes too much space, for
storage, display, and transport.
I settled on
sacrificing 3-dimensionality and the elaborate landscape, in favor of
offering better viewing angles for the hunter and his mount. Hopefully,
the idea of having the one mandrill leaping from the log adds enough
motion and interest to make up for the flatter scene.
 |
| Testing the arrangement and orientation of the essential elements of the piece. |
 |
These two photos show the two primary views that I want to work.
I want to ensure that there is "flow" and movement and that there is minimal overlap of the figures.
Triangles figure in the composition. Maybe not to maximum effect, but I think they're close enough. |
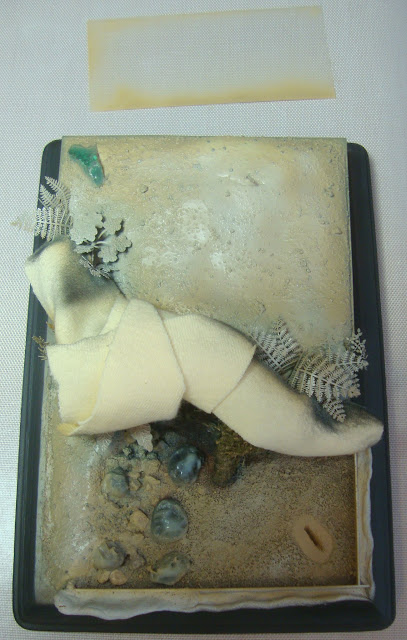
I used Apoxie Sculpt for the first time,
to bulk out the ground and fill gaps. I really like its consistency and
workability, much more than Magic Sculpt, which I find a little too
gooey and sticky.
 |
| Added a layer of Apoxie Sculpt. |
 |
| Smoothed the Apoxie Sculpt and added brass-etched foliage while the Apoxie Sculpt was still workable. |
 |
| Added
some initial texture, some Milliput filler, and the molds for the
water. The molds are plasticard L-beams, held in place with poster
putty and then seam-filled with a minimal beading of PVA glue. I have
no idea if it will work! |
 |
| A
piece of rod was left in place to preserve the position and orientation
of the hunter's pin. I kept jiggling this piece of rod while the putty
was setting to ensure that the rod would not be permanently affixed in
place! |
This next series of photos describes the near-disaster of attempting to glue down a sandy creek-bed.
 |
| I laid down the sand, dry. I plugged the slot where one of the mandrills needed to be positioned. |
 |
| The plan was to pour watered-down glue gently over the sand and let it soak in. Unfortunately, the glue just coalesced and "beaded" on top of the surface. It even "rolled" down the slope! |
 |
| My desperate real-time fix: Step 1 - double down on the glue and fill the area, hoping to keep the sand below the surface tension of the pool. Didn't quite work. |
 |
| Step 2 - Soak up the mess. Hope for the best. |
 |
| Hmm...this *might* work... |
 |
| Hunh. Well, close enough. First panic is over. More panic to come... |
 |
Here, I add masks in preparation for airbrushing.
I try two different types of masking fluid. The Vallejo masking fluid (green) is crap. I throw out the bottle. The Liquitex masking fluid (white) is awkward to work with, but it works. |
 |
| Colored primer. |
 |
| Initial shading. The liquid mask worked. |
 |
| A combination of airbrushing and brush-painting. |
 |
| Flock it! |
 |
| Alright, on to some fun stuff. 1st painting session. |
 |
| 2nd painting session. |
 |
| 3rd painting session. |
 |
| Finally, I reach a point in the project that rejuvenates my motivation. I can see the initial look of the piece. |
 |
| I'm digging it. The colors and composition match what I had in my head. |
 |
I add Milliput to the joins, to strengthen the joins and fill the gaps.
I'm nervous whether I'll be able to color-match the natural colors and textures of the wood and sand. |
 |
| Success! This success was a nice confidence-builder. |
 |
| Not quite as precise, but good enough, considering it will be covered with water and wave effects. |
 |
| It took me 2 or 3 sessions to melt different types of plastic. I never did get the effect that I really wanted. I'll need to experiment with some other types of plastic. But I have to press on. Too much time wasting. |
 |
| Cool, man. I'm liking it. I'm not thrilled with the properties of the Woodland Scenics Water Effects. As soon as I finished this part, I came across on Facebook a recommendation for Magic Water. I'm going to order some of that and try it out for the next project that needs more controlled water effects. |
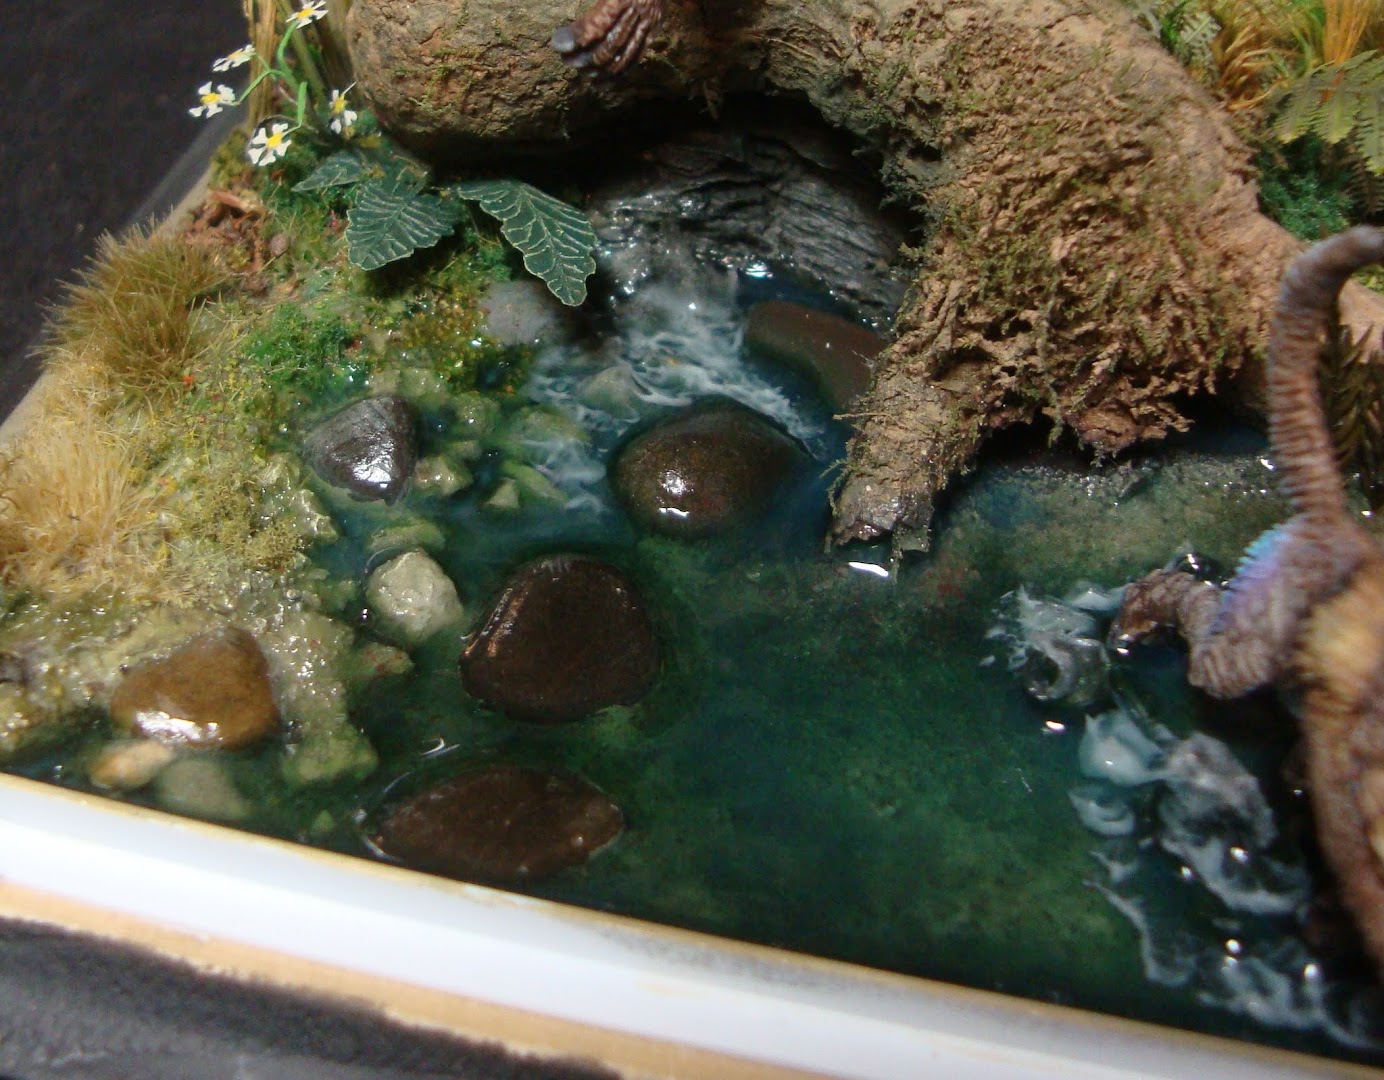 |
| The "frostiness" diminished, unfortunately. It's probably a good thing, actually, since that's something you would want to control with paint or pigment. But I liked this result, and I was hoping it would stay that way. It didn't. |
 |
| Going back in time a little bit, here was the second setback in the project. The first pour of water effects seeped through this corner, soaking the flock and leeching the resin out of the mold. Made a mess. I had already cleaned it up here. But what a pain. |
 |
| When the resin dried, I extended the bank with some Milliput, in order to seal the corner. I hoped that the first pour would have effectively "sealed" the flock that was sponging the resin. |
 |
| Color-matching again. |
 |
| Later, I noticed another side-effect of the first pour. The resin found its way to the pink foam, which soaked it up, expanded, and separated the siding. <Sigh!> |
 |
| Patched. |
 |
| Here, I experiment with wave and cascade effects. I was surprised that the resin retained its haziness in this case. Definitely hard to predict the behavior of this stuff. This was worthwhile practice. |
 |
| Finally, I begin work on the piece de resistance. First painting session. Color-sketching. Digging it so far. |
 |
| I'm very pleased with the how the feather colors are developing, but I'm beginning to feel uneasy about how the colors for the bird contrast with the colors for the rider. I have different visions for each element, but they're not going to work together. I want a desert look for the rider, but the bird isn't supporting it, as much I love the colors of the plumage. |
 |
| This view convinces me to neutralize the warm colors of the rider and the saddlebags. |
 |
| I like this color scheme better. |
 |
| Refining and sharpening the sketch. |
 |
| There are some details that could still be worked, but I'm basically out of time. |
And the final presentation.