Wednesday, April 29, 2015

Iron Painter Round 2 - WIP 2

An intermediate step for converting the Dark Elf.  I added a "core" of green stuff for the biceps, having learned my lesson that I need to build from the inside-out.


And here's probably the final conversion.  I might try to heat the pennants and see if I can have them fall a little more naturally.


Monday, April 27, 2015

Iron Painter Round 2 - WIP 1

I advanced to Round 2 of Iron Painter!  Here is the first WIP photo for the new theme:  "The end of the world as we know it".


I am converting a Dark Elf standard bearer.  I will use green-stuff to fill in his biceps, around the paper-clip armatures.  There's another figure to go with the scene....


I barely squeezed my way into Round 2 of the competition.  I beat my opponent by only one point, 38 to 37, if I recall.  There were over a half-dozen painters in the high tranche of high 40's and low 50's, out of a max score of 60 (20 max from each of 3 judges). 

So I have a lot of room for improvement to reach these judges.  I think the biggest thing that hurt me was the photo resolution on the gallery.  I sized my collage for the typical "vertical stack" of images, made common on the Cool Mini or Not web-site. 

Unfortunately, the max height on the Wyrd gallery was 960 or thereabouts.  And I couldn't edit or delete the submission!  The resizing forced the dimensions of my photograph to be about thumbnail-sized and therefore pretty much unreadable.  It was telling that most of the compliments for the piece praised the rock base!

Still, photo dimensions aside, the competition is strong.  226 painters entered Round 1, and 77 exited!

For Round 2, all the contestants are in 3-person match-ups.  Luckily, I think I'm matched against 2 opponents who are fair matches.  I don't think I'm up against any of the professionals or heavyweights.  That said, one of my opponents did very well on theme in Round 1, and the other opponent paints in a high-contrast style.  High contrast, I think, usually finds favor in on-line competitions.  I need to amp up my own contrast, as a matter of fact.

Planning my freehand for the banner....

Sunday, April 19, 2015

Iron Painter - Round 1 - Fool's Gold

I had one more WIP series, but it shows the piece pretty close to the final version, just without the foliage and minus refinements on the figures.  (The goblin and Momma-Squig are intentionally out-of-focus for this view, hopefully to help give a sense of motion and suspense to the scene.)


I made my deadline to post the photos on the Wyrd gallery.  Because we can only post one photo in the gallery, I combined these three photos into a collage.  Unfortunately, the gallery shows the collage in a reduced size and resolution, compared to the original photo.  Fail!


I don't have an ideal angle to show the piece.  The first image is close to what I had in my mind's eye, before I started.  I should have positioned the baby squig, before I painted it, so that I could see at what angle to place the scepter in his mouth.  The angle required to clearly see the face of on the scepter is a looking-down angle, an angle which looks pretty lousy for the rest of the composition.


The colors worked out OK, but I think I might have come up with better combinations, given more time to think it through.  Still, I gained a lot of practice with colors that I rarely use, namely bright yellow, orange, and red.

Saturday, April 18, 2015

Iron Painter WIP III

I didn't get quite as far as I expected over the last couple of days, but I feel like I'll still make the Sunday night deadline.

I added more pumice to the top of the rock outcropping so that it would look more like a trail of integrated soil and less like bark.


Finally added the models!  It was almost impossible to drill these models for pinning.  I had left a piece of the slotta-tab on the bottom of their foot, which I could use to give more surface area for the 5-minute epoxy.  Even so, the purchase is weak, and I had to support the models with cork and allow the glue to set for a day.


Primed.  I can finally begin painting!


The sight lines turned out decent.  I hope this will be one angle I can use for the final photography.


Meanwhile, continuing to work on the jester's scepter.  I attached the head, and I had to reinforce the attachment point to the rod.  I experimented with a mix of Milliput and 5-minute epoxy, and the join finally feels like it's going to hold.


Trying to smooth out the piece with Milliput, followed by sanding with emery paper.  It needed 2 or 3 more layers, but I'm beginning to get impatient...


Airbrushed the "stage".  This was fun.


Some color prep and some pattern-work.  This is the first time I've attempted a harlequin diamond-pattern.  It was harder than I thought it was going to be, and it took more time than I expected.


I enjoyed painting the squig.  I used a lot of my "comfort-zone" watercolor-style wash technique, combined with some wet-blending and opaque highlighting.


This is where I'll leave it for the evening.  I like the color schemes of the individual models, but I'm not crazy how they all go together as a whole.  I may need to fuss with it more.

Only one day left to complete painting the figures, complete painting the base; enhance the base with foliage, sand, and pigments; and take photographs and attempt to make a collage.  Down to the wire!


Wednesday, April 15, 2015

Iron Painter WIP II

I'm working on the base, while I work on the green-stuff scepter in parallel.

From prior painful experience, I learned to drill the holes and attach the magnet (for transportation) in the base before doing any other work on it...


Justin McCoy hates using bark chips for stones.  But I still think they look pretty cool.  Especially if I can dress them up enough with additional dirt and sculpting.  Maybe this project will get it out of my system.  (But to be honest, I think I have a few projects left in me, where I still want to use them...)


Fun with glopping glue everywhere.  This is the kind of activity that makes you feel like a kid again.


My scene is beginning to take form...


Filling in the gaps with Milliput.


Dirt and modeling paste...


...and roots...


Meanwhile....


Sunday, April 12, 2015

Iron Painter WIP

I decided to participate in the Iron Painter on-line painting competition for the first time.  To be honest, I never really paid much attention to it before.  I forget why it attracted my attention this year, but I like the notion that it allows models from any manufacturer. 

The competition also plays to some of my strengths, which are more logistical strengths than they are painting-talent strengths -- namely, 1) I have a large collection of miniatures and accessories on-hand from which to devise themes, and 2) I paint fairly fast.

These two advantages play into Iron Painter, since there are only two weeks to paint for each round of competition, and each round has a unique theme, which is announced at the beginning of the two weeks.  There is practically no time to acquire any miniatures or materials for each round!

Iron Painter announced Round 1 on Friday, April 3rd, and the deadline is Monday, April 20th.  They made a mistake, because the competition is supposed to start 2 Mondays before the deadline, so they gave us an extra weekend by mistake!

It turns out I could really use that extra weekend, because I'm taking on some actual sculpting, and it's taking more time than I planned.  I've never attempted sculpting before, actually.  I've only ever done gap-filling.  The most advanced thing I've done is try to blend in fur texture.  But to complete the story I want to tell for Round 1's theme, "Fool's Gold", I need to build scratch-build an element that I don't have handy.

My vignette is based on a fairly rare GW set of models, called "The Chase".  A goblin is chasing a baby squig, I suppose to capture it for a squig herd, and the Momma Squig is chasing the goblin, ha, ha! 

The goblin in the set wears a hat that looks like a jester's hat, so I have my Fool.  But for my Gold, I wanted the baby squig to be running away with the Fool's scepter.  Which is where sculpting comes in...

Here are the miniatures, with flash and mould lines removed, and there is my foundation-piece for a jester's motley collar.  Three pieces of wire smushed together with green-stuff putty.


I'm pleased with how it started out.


Unfortunately....

When I tried bending the wires down, it all fell apart.  Had to start over. 

This time I bent the wires first.  The center was a blobby mess, and I had to pick off the excess.  The wires are not as symmetrical as the first attempt, and the ring connecting it to the rod is not as clean.  I hope to make corrections, when I add later layers.


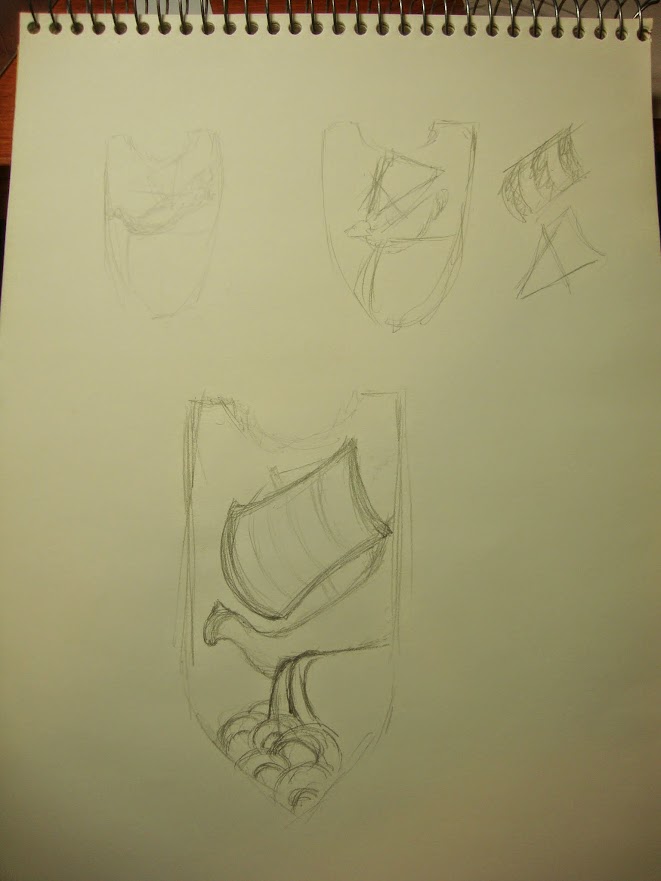
Here are my first two attempts to sculpt a head.  They look awful right now, but that's because they're just initial forms, which need more refinement.  Not to say that the final version won't look awful either! 

I built the first head from the bottom-up, but it was coming out too large.  50% larger than the actual goblin miniature!  I started over, building from the inside-out, instead of bottom-up, like I see every professional sculptor do.  I don't know why I didn't just start out like that the first time, since I knew that's how they work.


Adding more elements.  Yup, still looks horrible, but I have a plan....


I had to make a trip to several craft stores, before I found beads that I could use for the ends of the collar and the hat.  By the way, this is as far as I've progressed in two weekends.  So much for my speed.  Wait, I said I could paint fast.  Something tells me I'm going to be painting all next weekend...


Here's an example of refining a yukky mess into something smoother and closer to final form.  I hope I can achieve the same for the head!


Sunday, April 5, 2015

Back in action

I had a mostly successful move from Alexandria, Virginia, to Huntsville, Alabama.  I say 'mostly', because I did suffer one miniatures-related casualty.  This....


...became this....


Long story, which I won't dwell on here.  Suffice to say, some movers are idiots and choose to ignore simple, repeated instructions.

On a more positive note, I am settled in enough to comfortably assemble and paint again.  My collection and supplies are more organized and more discreetly tucked away in the hidey-holes of the new place.

I eased back into the hobby with some low-pressure projects, beginning with batch-painting 15 Orc pikemen for War of the Ring (I don't have any pictures of them handy).  Then I moved on to Zoraida, the Hag, for Malifaux.


I started Zoraida probably 4 or 5 years ago, when I first started playing Malifaux, in fits and starts, until I and the game found a satisfactory common ground.  I have a few other "Swamp Fiend" models to paint to add to her crew, and then I'll have another crew to field in the game.

My next project was to finish up another couple of models for Malifaux, the Night Terror.


I wanted to push myself towards that altered mental state where Frank Frazetta, Boris Vallejo, Simon Bisley, and apparently every French artist resides -- one where the colors are pronounced and slapdash, and somehow still work coherently.  I'm pleased with my progress on this one.  I'm not quite sure what my take-away is with it, though, in terms of a repeatable skill or frame-of-mind.


I use these models to proxy for Malifaux Raptors in the game, which I enjoy using to harass and, if I'm lucky, neutralize enemy models anywhere on the board.


My Swamp Fiend projects will have to wait, as it turns out.  I signed up for the Iron Painter competition, which will keep me occupied anywhere from 2 to 10 weeks.  More on that in the next post.